Attention:
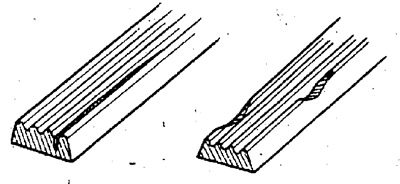
- When checking belt tension, check for damage and replace if necessary.
- If you are installing a new belt, adjust the tension, start the engine, wait 5 minutes, and then re-adjust.

1. Check the A/C compressor belt tension.
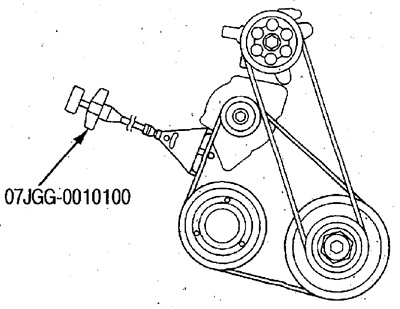
Checking with a special tool for measuring belt tension
- Install the special tool as shown in the figure and measure the belt tension.

- Refer to the instruction manual for the special tool for how to measure the tension.
- When installing and removing the special tool, and during measurement, make sure that it does not interfere with surrounding components.
- Because the arrow is fixed during the measurement, make sure that when removing the special tool from the belt, the reset button does not touch the surrounding components.
- Install the special tool perpendicular to the belt.
- Make sure that the measuring section of the special tool does not touch other belts.
Standard belt tension:
- New belt: 1080-1230 N (110-125 kg)
- Run-in belt: 490-590 N (50-60 kg)
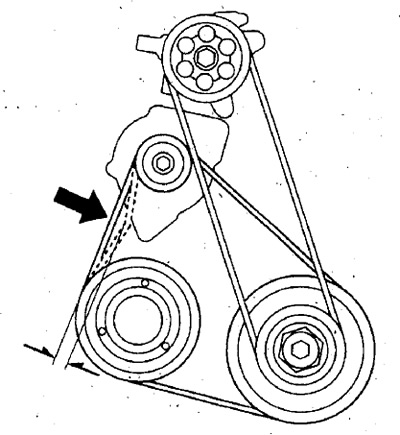
Press the belt between the pulleys with a force of approx. 98 N (10 kg), as shown in the figure, and check the amount of belt deflection.
Standard deflection:
- New belt: 4.0-6.0mm
- Run-in belt: 7.0-9.0mm

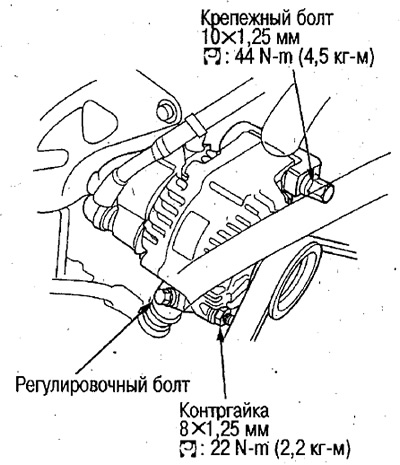
2. If the deflection of the belt is different from the specified, loosen the mounting bolt and locknut, adjust the tension with the adjusting bolt.
3. Tighten the mounting bolt and locknut, recheck the belt tension. If the belt tension is correct, tighten the mounting bolt and locknut to the required torque.

