Withdrawal
1. Remove the rear wheels (see above).
2. Remove trim (see ch. Body).
3. Loosen the top nuts.
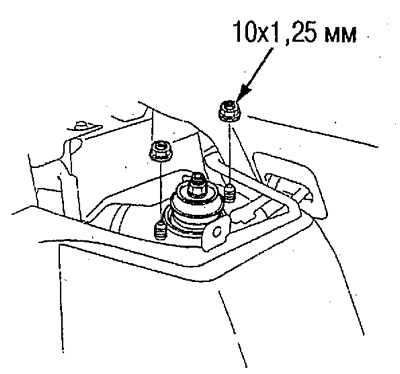
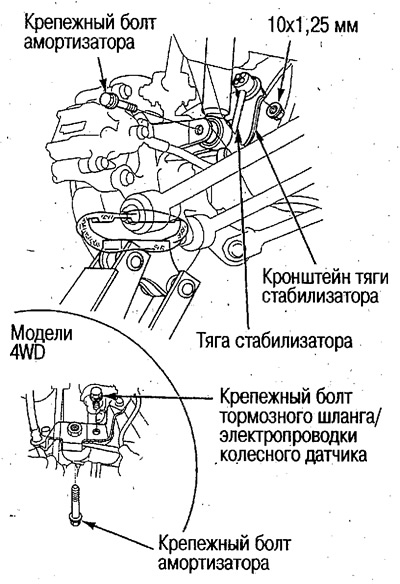
4. Disconnect the shock absorber from the fist and remove it.
2WD Models
Disconnect the stabilizer link from the bracket and unscrew the shock absorber mounting bolt.
4WD Models
Remove the wheel sensor brake hose/wiring bracket mounting bolt and remove the shock absorber mounting bolt.
Disassembly
1. Install the shock absorber assembly on the spring extractor and compress the spring. Unscrew the self-locking nut using a hex wrench and a special tool.

To use a spring puller, see the instructions for use of the puller.
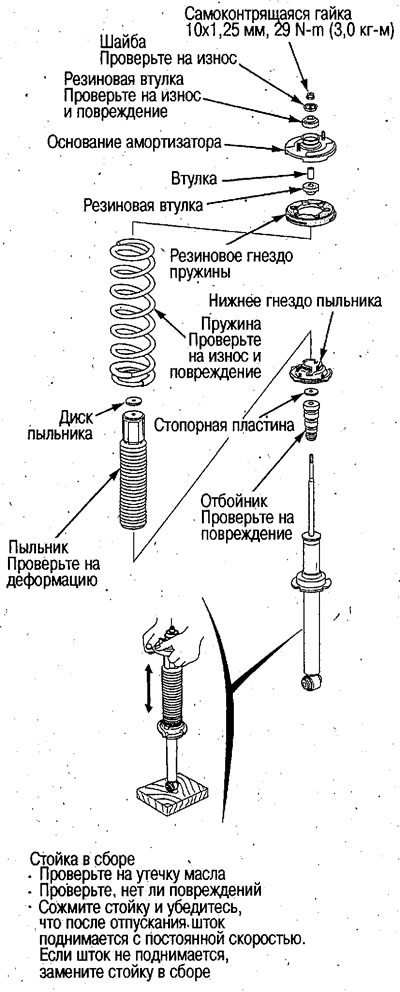
2. Disassemble the shock absorber to the state shown in the figure.
Assembly
1. Install the bottom boot seat, fender, fender disc, boot, boot disc, bushing, and lower rubber bushing on the strut. Install the spring by aligning the lower end of the spring with the step in the lower seat.
2. Install the rubber spring seat, damper base, upper rubber bushing, washer, and place the damper assembly on the spring puller.
Install the shock absorber base as shown.
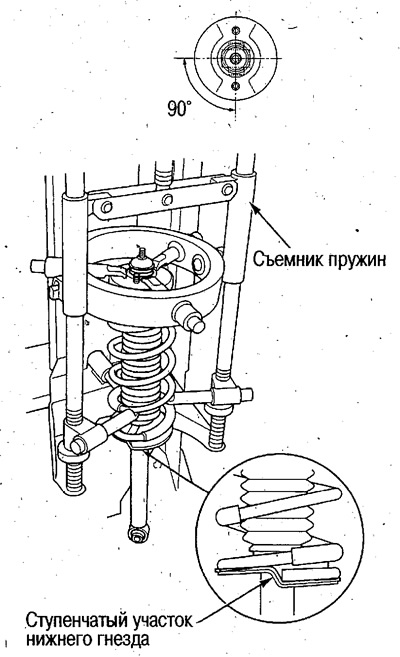
3. Compress the shock absorber until the end of the strut rod comes out of the hole in the washer installed on the base.
4. Install new self-locking nut (12 mm) and tighten it with the required force, fixing the stem of the rack with a hex wrench.
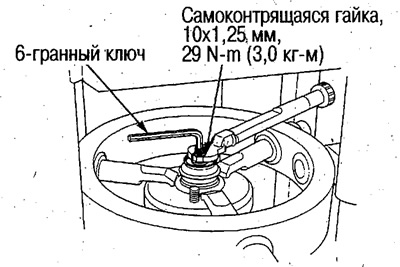
5. Remove shock absorber assembly from spring puller.
Installation
1. Install the shock absorber on the frame.
Do not confuse the left shock absorber with the right one.
2. Hand tighten the top nuts.
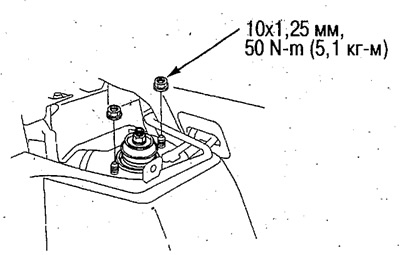
These nuts are tightened when the weight of the vehicle acts on the shock absorber.
3. Connect the shock absorber to the fist and tighten the shock absorber mounting bolt by hand.
4. Pre-install the stabilizer link.
5. Support the suspension with a jack so that the weight of the car acts on it, and tighten the bolts / nuts with the required force.
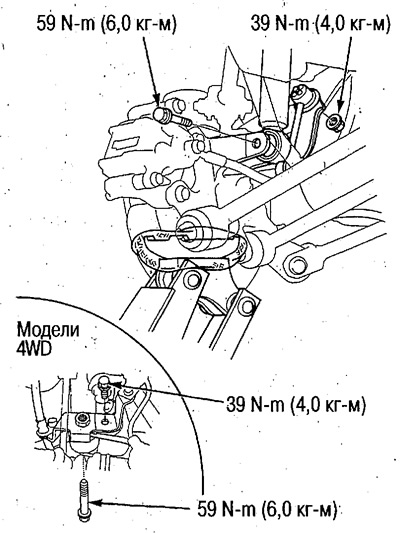
6. Tighten the nuts hand-tight in step 2.
7. Install the rear wheels (see above).
8. Check and adjust wheel alignment (see above).
