Pedal Height
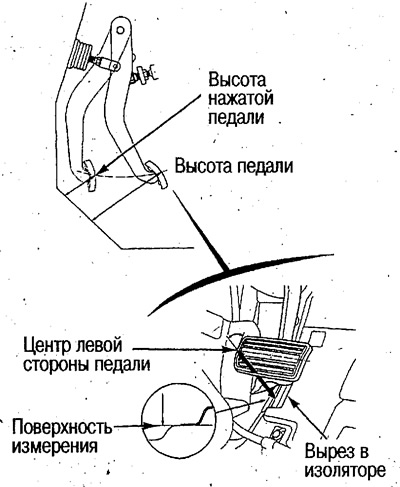
Measure the distance from the pedal to the floor surface.
Unscrew the cutout in the insulator and measure the distance from the center of the left edge of the pedal to the metal surface of the floor.
After measuring, return the floor covering to its original state.
Depressed pedal height
1. Release the clips and unscrew the floor covering.
2. Start the engine and press the brake pedal 2-3 times, and then press the pedal with a force of 196 N (20 kg).
3. Unscrew the cutout in the insulator and measure the distance from the pedal db to the metal surface of the floor.
- Pedal height when pressed with a force of 196 N (20 kg): 130 mm
Released pedal height
1. Release the clips and unscrew the floor covering.
2. Turn away cut in an insulator and measure distance from a pedal to a metal surface of a floor.
- Released pedal height: 180mm

Pedal Height Adjustment
If it is necessary to increase the height of the pedal, unscrew the brake light switch so that it does not touch the pedal.
1. Fix the connection of the brake pedal lever with the earring using a pin with a diameter of 6 mm or an M6 bolt (only on IHCC models).

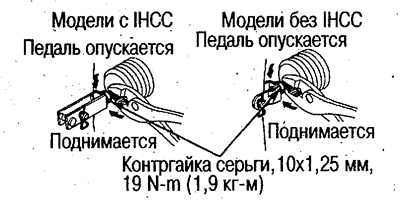
2. Loosen locknut (10 mm) earrings and adjust the pedal height by turning the push rod. Tighten locknut after adjustment.

3. Loosen locknut (10 mm) brake light switch and tighten the switch until the end of the threaded part of the switch touches the brake pedal (pedal depressed). Then turn the switch in the opposite direction ¼ turn (approx. 0.3mm) and tighten the locknut (10 mm).

4. After adjustment, remove the pin with a diameter of 6 mm (only on models with IHCC).
Attention:
- After adjusting the pedal, make sure there is free play. If there is no free play, the brake pads may touch the brake discs.
- After adjusting the pedal, check that the brake lights are working properly.
Pedal free play
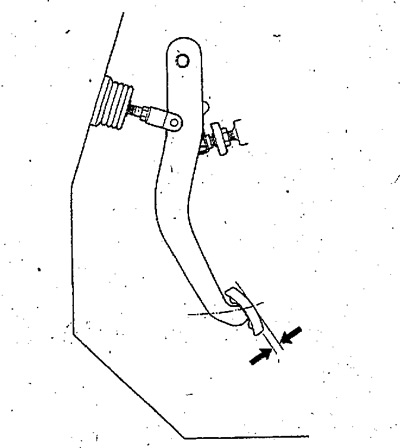
With the engine off, depress the brake pedal 2-3 times, and then measure the free play by depressing the pedal with your finger until resistance is felt.

- Free travel: 1-5mm
