Replacement
SRS parts are located in this area. Review the SRS parts location, safety precautions, and work procedures in the SRS section before attempting any repairs or maintenance.
Note: LHD type shown. RHD type is similar.
1. Disconnect the negative cable from the battery.
2. When the engine is cold, set the temperature control lever to MAX. NOT (open the heater valve), then drain the engine coolant from the radiator.
Warning. Do not remove the radiator cap when the engine is hot; The engine coolant is under pressure and can scald you.
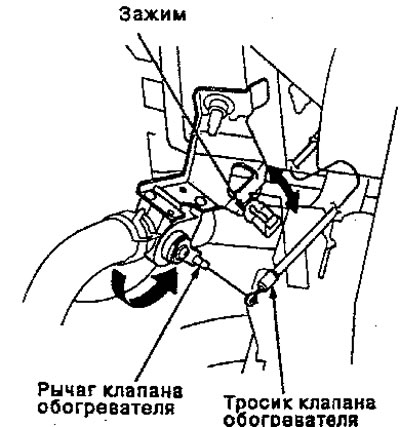
3. Open the clamp, then disconnect the heater valve cable from the valve lever.

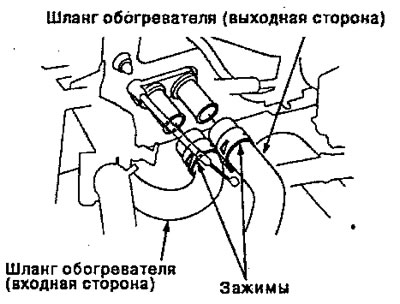
4. Disconnect the heater hoses from the heater assembly.
Caution: Engine coolant will damage paint. Quickly remove spilled engine coolant from painted surfaces.
Note: Engine coolant will leak when the hoses are disconnected; drain it into a clean bucket.

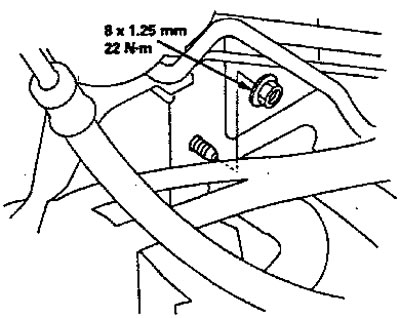
5. Remove the mounting nut from the heater assembly.
Note: When removing the mounting nut, be careful not to damage or bend fuel pipes, brake pipes, etc.

6. Remove the dashboard.
7. Remove the radiator pipe or evaporator.
8. Disconnect the connector from the mode control motor and remove the wiring harness clamps and wiring harness from the heater assembly. Remove the clamp from the radiator pipe, then remove the two retaining nuts and the heater assembly.
9. Install in the reverse order of removal. Please note the following.
- Apply sealant to the gaskets.
- Do not interchange the radiator inlet and outlet hoses. Make sure the clamps are secure.
- Loosen the bleeder bolt on the engine, fill the radiator and coolant filler barrel with the appropriate engine coolant mixture. Tighten the bleeder bolt when all the air is out of the radiator and the engine coolant begins to flow out.
- Connect all cables and make sure they are adjusted correctly.
- Make sure there is no air leak.
Major renovation
Note: LHD type is shown, RHD type is similar
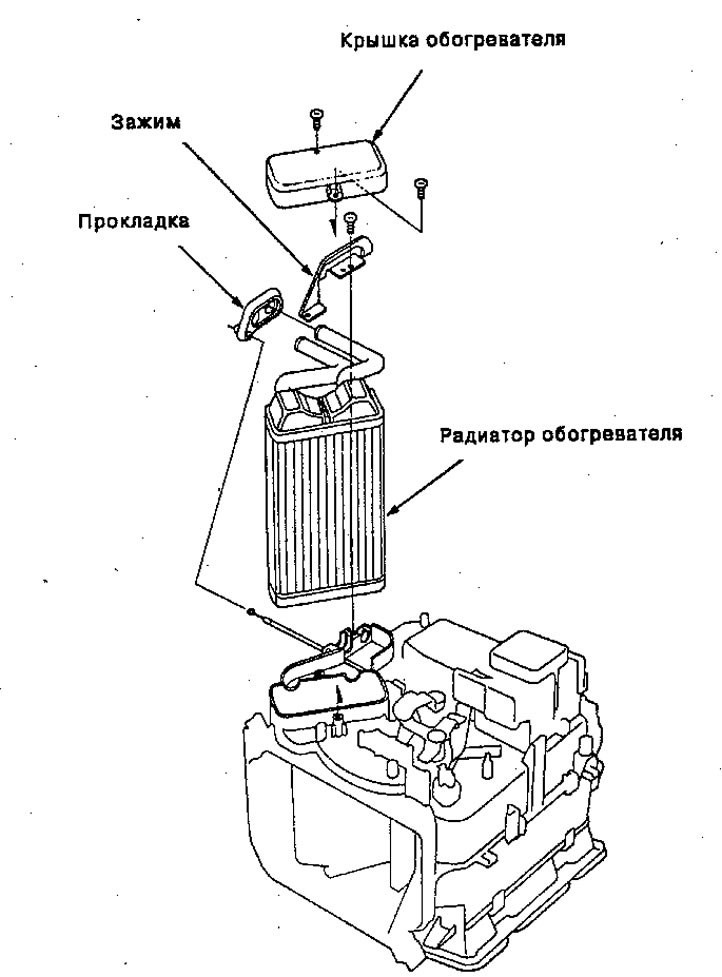
1. Remove the two self-tapping screws and the heater cover,
2. Remove the gaskets from the heater core tubes.
3. Remove the self-tapping screw and clamp.
4. Pull the heater core out of the heater assembly.
Note: Be careful not to bend the inlet and inlet tubes when removing the heater core.
5. Reassemble in the reverse order of disassembly.

